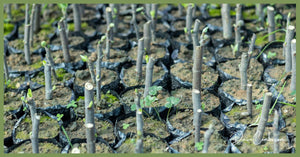
Plant New Cuttings With Natural Root Hormones: RECIPE
If you're looking to make more plants from your plants, cuttings are an easy first choice. But, did you know you don't have to buy those chemical rooting hormones to do it? I've got a few suggestions for easy teas you can use to root your cuttings, and my best tips for successfully making new plants this way.
Why Make More Plants From Your Plants?
It's an incredible money saver!
One of the plants that we would really like to have a lot more of is lavender. We already have a pretty large planting so instead of paying $40 or more per flat from someone else, I’m going to go out and give my established beds a trim.
Propagating your own plants is also a great way to start a community of like-minded plant geeks.. because once you get started you're going to quickly want (and NEED) to share!
There are many ways to make more plants beyond the obvious- planting seeds. Seeds have their place, but there are some plants that don't come up true from seeds (like peppermint) and when we're talking about perennials, there is the unfortunate need for more patience than I've got.
One of my favorite ways to multiply my gardens is by taking cuttings.
How To Take Cuttings
Cuttings are typically taken either in the spring or fall. Next year, I'd like to have a pretty massive planting of lavender for our front production garden. That could get pretty pricey as I mentioned earlier, but not if I use what I've already got!
Lavender is said to be best to take in the fall, but late spring will do as well. I’ll be picking the shoots that are firm, not delicate, brand new growth. I’m looking for an established branch of the lavender that is still green and not woody.
Here are the steps needed to take a cutting:
Step One- CLIP
I'll cut about a six inch shoot of the plant with a pair of very sharp and very clean clippers. I will try to choose a shoot that isn’t trying to flower. If I can’t find one, I’ll remove the flower before the next step.
Step Two- TRIM
I’ll trim off all but one or two sets of leaves near the top of my shoot. I’m removing the unnecessary leaves and flowers because I want this new plant to devote all of its energy to developing roots rather than continuing to feed leaves and make flowers.
Step Three- MIX
I like a soil mixture that is about 2/3 potting mix and 1/3 sand. I want the soil to hold moisture, but not to become waterlogged. Each stem that is prepared to this point will be dipped into a rooting compound (see my recipe below) and then placed directly down into the soil of a plastic greenhouse tray or leftovers container. At least 2 of the ”nodes” (where the leaves were cut off before planting) will need to be below the surface of the soil. This is where the new roots will develop.
Step Four- GREENHOUSE
No need for a big investment here. I often place a plastic tray cover or a plastic bag over the whole container where I've started my cuttings. It's important to keep the tray and your new plants evenly moist and warm until they begin to sprout roots.
After a few weeks, I’ll come along and gently pull upwards on a few plants. If they give easily, they need more time. If they provide resistance to my tug, they are well on their way to establishing a new root system and it won’t be too long before I can set them out in their new rows.
Natural Rooting Compounds
One of the things that trips up the first timer when taking cuttings is failing to use a rooting compound. You can buy one from the store, but they contain chemicals that you may not like to have in your vegetables or herbs. Instead, there are a number of plants that may already be growing in your garden that can help you out. Here are a few of them to get you started:
- Comfrey (Symphytum spp.) tea made from any part of the plant.
- Honey Tea: add a spoonful of honey into a cup of warm water and allow it to dissolve. Spritz, water or soak your cuttings for best results.
- Willow (Salix spp.) or cottonwood (Populus spp.) tea can be used interchangeably and might be the most commonly used for rooting.
- Willow Tea Recipe:
-
-
- Cut new spring growth (green or yellow shoots only) into short lengths
- Soak them in warm water for 48-72 hours.
- Soak the the parts of your cuttings that will be below the soil in the completed willow tea for several hours or overnight. NOTE: If that is not possible, you can water the soil where you’ve planted your cuttings at least twice. Willow tea can be kept up to 2 months if tightly sealed and refrigerated
-
Happy cutting!

